Flower Thumb Tacks

I’ve been working lately on making my office-cubicle-space a little bit happier. I already shared the paper sorter I made from cereal boxes. Today, I’m sharing some thumb tacks I prettied up with some resin flowers.

Blue Resin Flower Thumb Tacks

I got a silicone mold a while back from etsy to make these super cute dahlia/chrysanthemum cabochons. When I got the mold, I used it to make some earrings out of clay. This time, I used resin to make the flower cabochons. I used three different resin dyes – an opaque white, transparent blue, and transparent green – to make a range of slightly different colored push pins.

Resin Supplies for flower cabochons

Since my mold only has three flower spaces and they take at least 12 hours to harden, I could only make three pins at a time.  That made this project take several days, but it wasn’t much time each day. To make each set of flowers, I mixed the resin according to directions on the box (follow them exactly even if they seem tedious!) using a food scale to ensure even quantities of resin and hardener. For each batch, I mixed up about 10 oz. of resin which was more than enough. I then added a few drops of dye, and poured the resin into the mold. I did lots of shaking/taping the mold (carefully to avoid spilling!) to release any bubbles formed in the fairly intricate mold. You can tell that some of the earlier ones I made have several bubbles on the petals – lots of tapping the mold helps get rid of these. You can also find perfect already made ones on etsy – just search for ‘resin flower cabochons’ under supplies.

Resin Chrysanthemum Cabochons

Then just set it aside to dry overnight, and popped them out it the morning.

Flower Thumb Tack Supplies

Once I had my flowers, I just superglued them onto plain silver pushpins. Easy-peasy!

Blue Resin Flower Thumb Tacks

And here there are holding up some of my favorite pictures in my office! They sure brighten up my day at work 🙂

DIY Thumb Tack Photo Wall

Cereal Box Paper Sorter

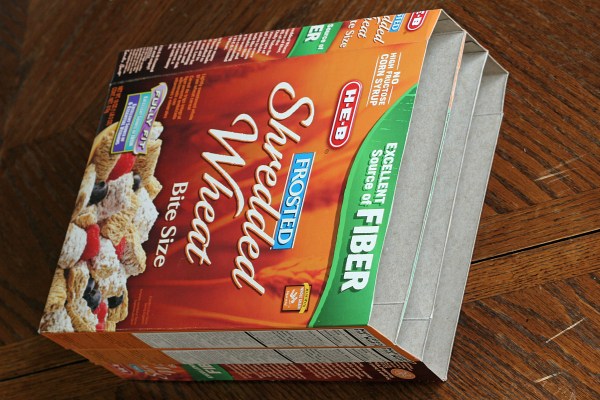
I’ve always got a ton of papers on my desk. I have seen some paper sorters on pinterest and decided I’d make a cute one for my desk. I thought cereal boxes would be perfect since they have nice thin cardboard. It turns out my husband goes through a lot of cereal and we haven’t gone to the recycling center in a while, so we had lots of cereal boxes on hand. It turned out all the paper sorter designs I could find involved corrugated cardboard or boxes I’d have to buy, but I figured out a way to work with what I had.

cereal box paper sorter

It seemed like it would be pretty easy, right? Just cut the front flaps off of some cereal boxes, glue them together, and cover with pretty paper. Unfortunately, none of our cereal boxes fit normal pieces of paper – none of them were 8.5″ wide. So, I took apart three cereal boxes and made them into the right size. You’ll need ones that are at least 11″ tall and for which the width + depth is at least about 10″. (mine was 11″ tall, 2″ deep, and 8″ wide and was about perfect)

cereal box diagram for paper sorter

I undid all the glued seams on the box – on the bottom and along one of the sides. Don’t just cut the box open – you need to carefully tear the seam along the side of the box and keep that extra flap so you can glue it back together. This provided a flat sheet of thin cardboard in the shape of the diagram above. I laid this out, and scored vertical lines to make the big faces 8.75″ wide (along the dashed red lines above). Then I folded the box back together, but along these new scored lines. I glued all the seams back together with hot glue, including the bottom of the box. In order to glue together the bottom of the box, I had to trim a couple of the closure flaps.

Cereal box paper sorter in progress

Then I just hotglued the three boxes on top of each other! I used Mod Podge to cover the outside in a fun turquoise cloud print scrapbook paper, and covered the inside slots (bottom and two sides) with a darker color scrapbook paper. I lined all the edges with some washi tape ($4 for 4 rolls at target!) to cover the seams. For the washi tape around the outer seam, I just clipped the washi tape where the boxes met so it could go around them easily.

cereal box paper organizer

I’ve had this at my office for a few days, and its really helped corral the papers on my desk. Plus makes it easier for me to find important papers! And looking at it always cheers me up – I love the fun clouds and turquoise color 🙂 Plus since I had everything but the scrapbook paper on hand, it only cost $1.50 for the 6 sheets of scrapbook paper on sale – can’t beat that!